Custom Templates
Custom Templates allow you to define the structure of your project. This allows the creation of your own pipeline, specific to a department or show. You can also create your own statuses and map them to a workflow.
Warning
Custom Templates is an advanced feature of LoUPE. Your custom templates should be thoroughly tested before using them in production.
Video
In this video we recreate the built-in Episodic template from scratch using the type and template features added in version 1.1.
Walkthrough
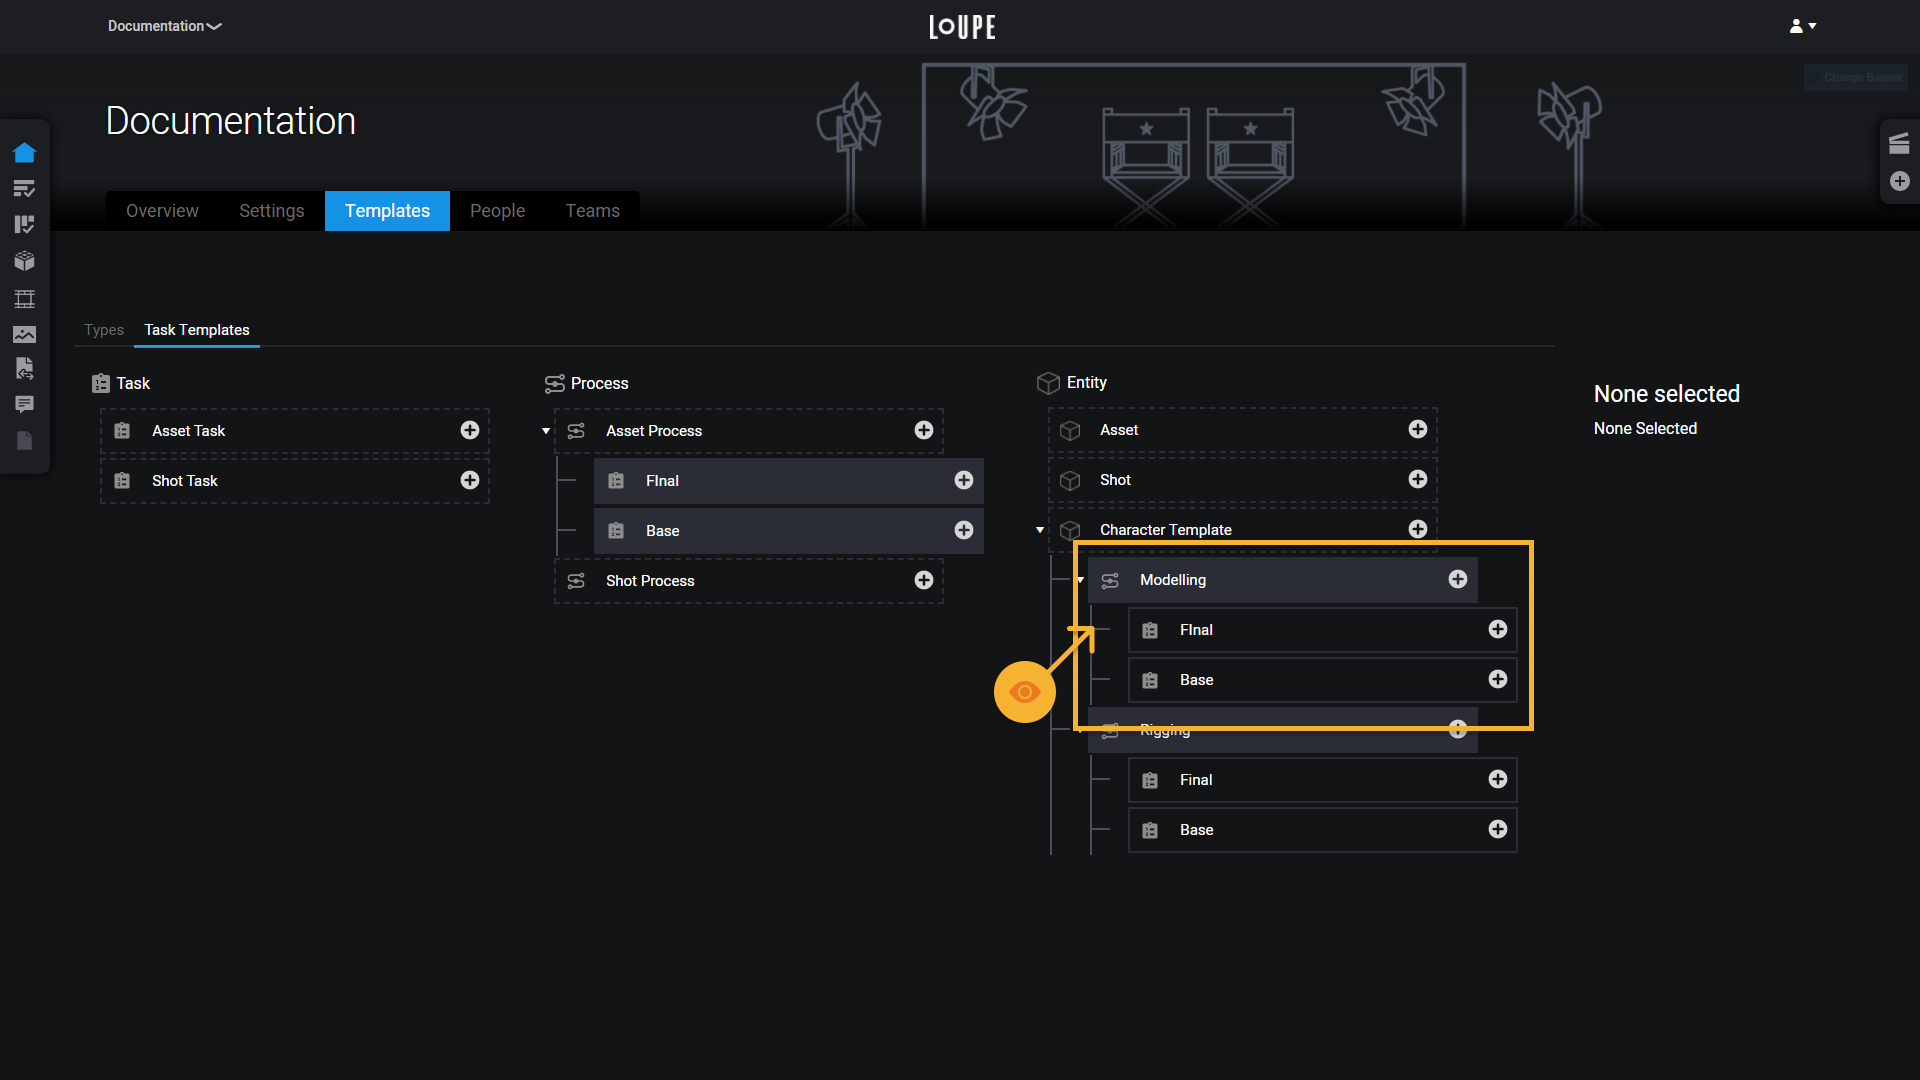
In this example, we’ll create an Entity called “Character”, allow it to be created in the Asset Library, and give it a template so that anytime we make a Character, it has a Rigging process, and a Modelling process, both with a Base and Final task. The structure will look like this:
↳ Character (Entity)
    ↳ Rigging (Process)
        ↳ Base (Task)
        ↳ Final (Task)
    ↳ Modelling (Process)
        ↳ Base (Task)
        ↳ Final (Task)
Our Character will function just like the Asset entity, except by creating this custom Type we’ll be able to define a custom template specific to our Character-building workflow.
Steps
Create a New Project
When working with custom templates, the easiest way to start is by creating a new project, and selecting the “Minimal Template”.
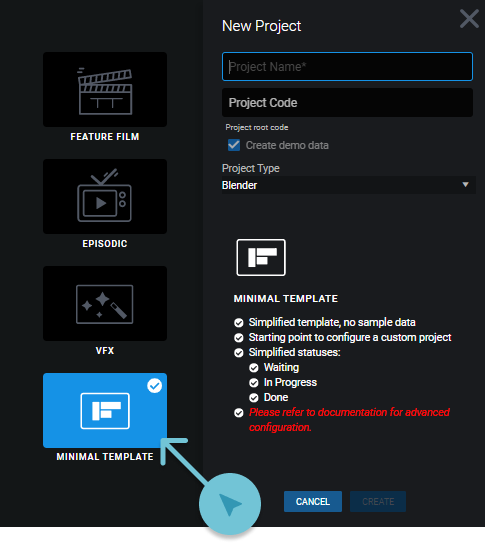
This template makes the fewest assumptions about the data in your project, but still includes some pieces that LoUPE currently requires to function, like entities for Shots and Assets.
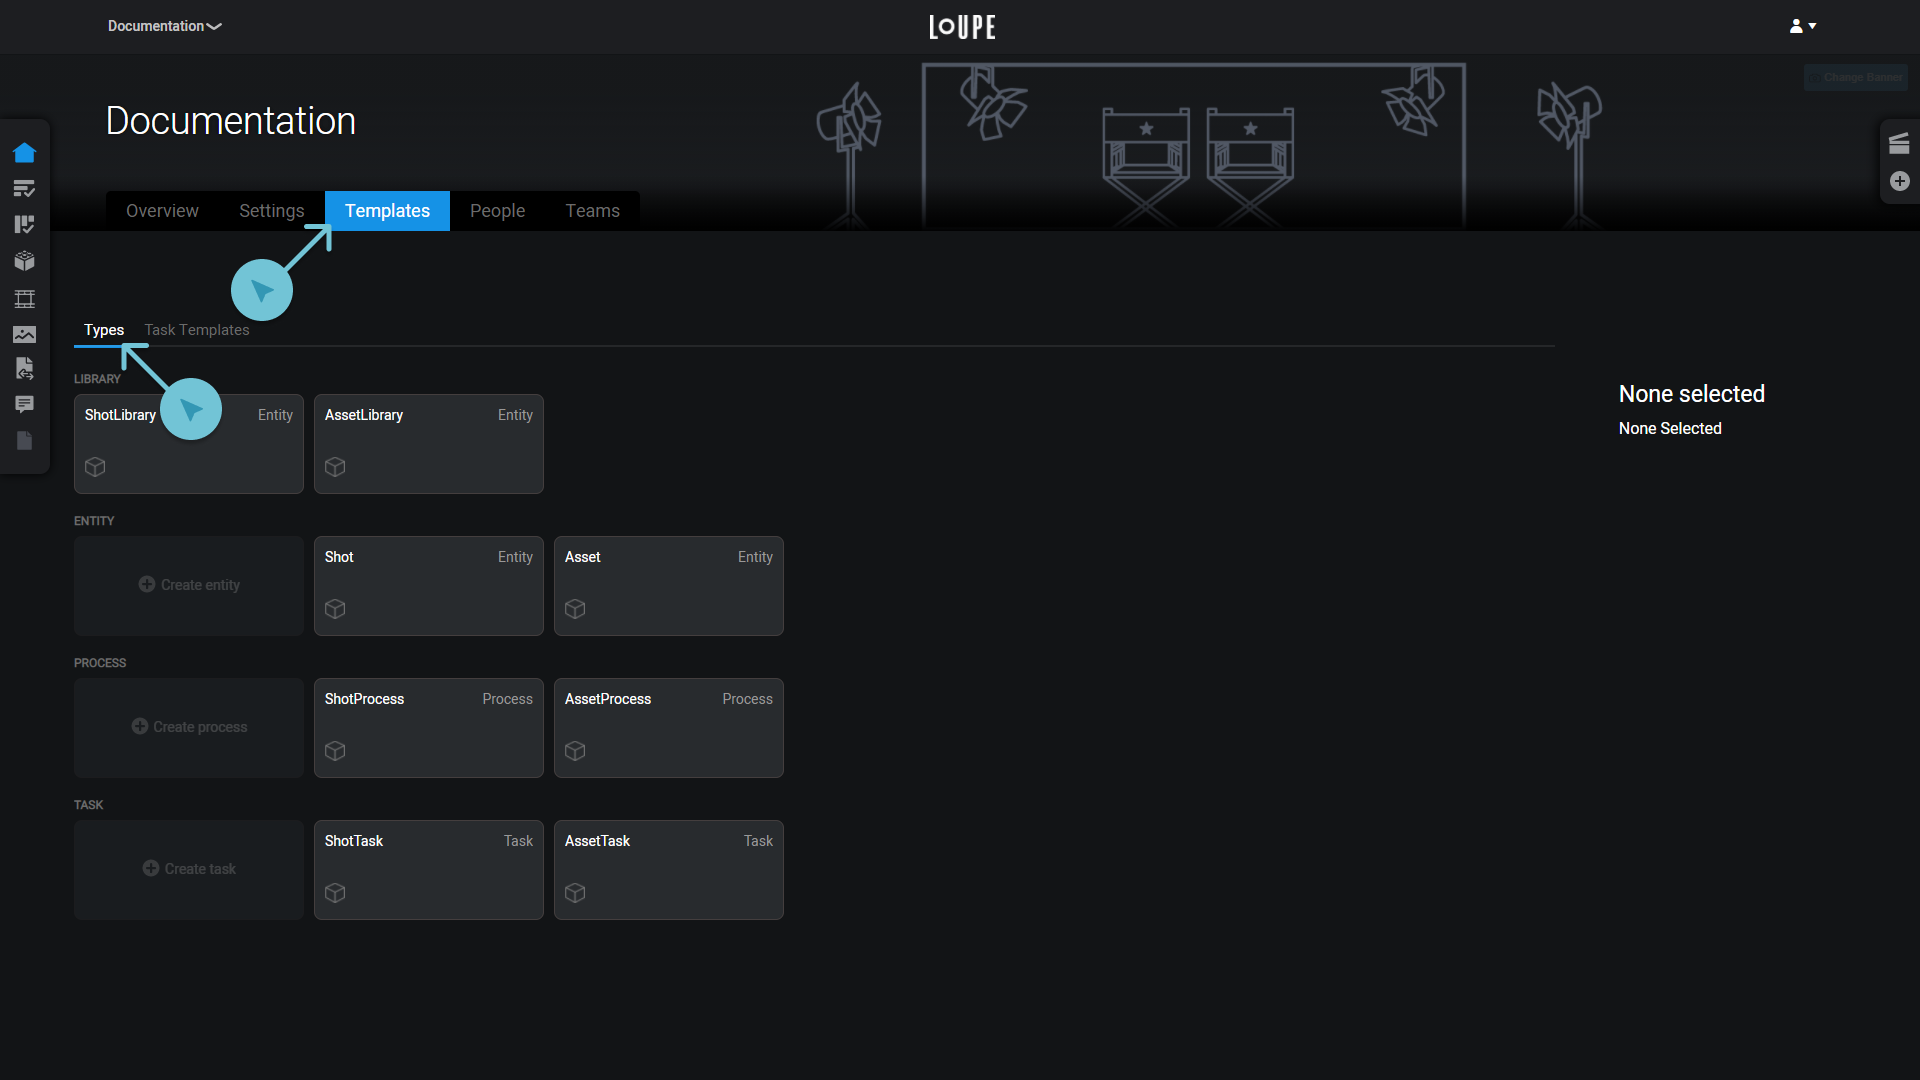
Go to the Templates Tab
On the overview page for your new project, go to the templates tab, by default you should be on the Types view, but if not, switch to it, where you’ll see a list of existing Types grouped by what they represent.
LoUPE has several base Types which you can extend to customize your projects:
| Library | Currently read-only containers for Shots and Assets, although you can edit their allowed children. |
| Entity | Anything on the project that has child entities, processes, or tasks that go into completing it. For example, a Shot (has child processes or tasks), or a Sequence (has child Shots). |
| Process | A team, department, or step that goes intro creating an entity. Processes will have sandbox and publish areas for asset management. Can also be a container for other processes and tasks. |
| Task | Any specific unit of work. Tasks are for project management only, and do not have a representation on disk. |
Create a New Type
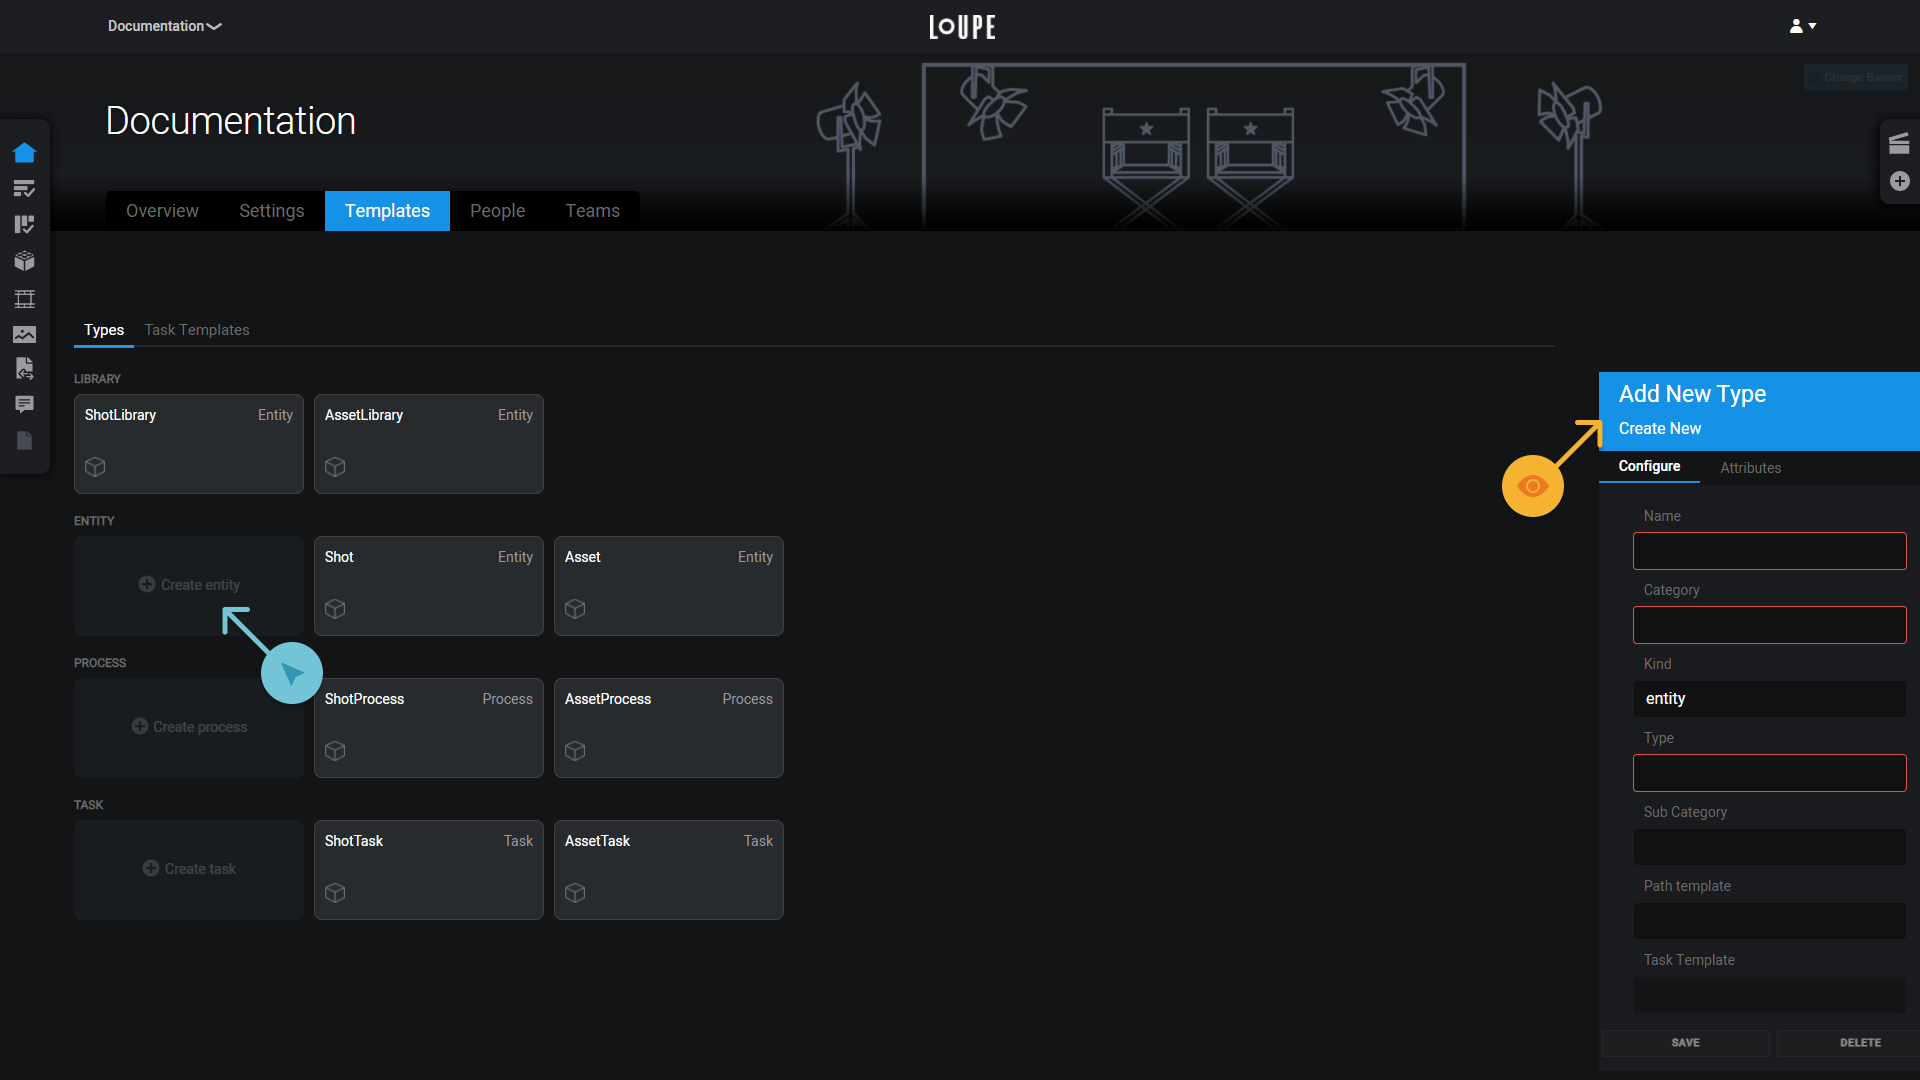
In the “Entities” group, click the “Create New” button. An editor will open on the right side of the interface.
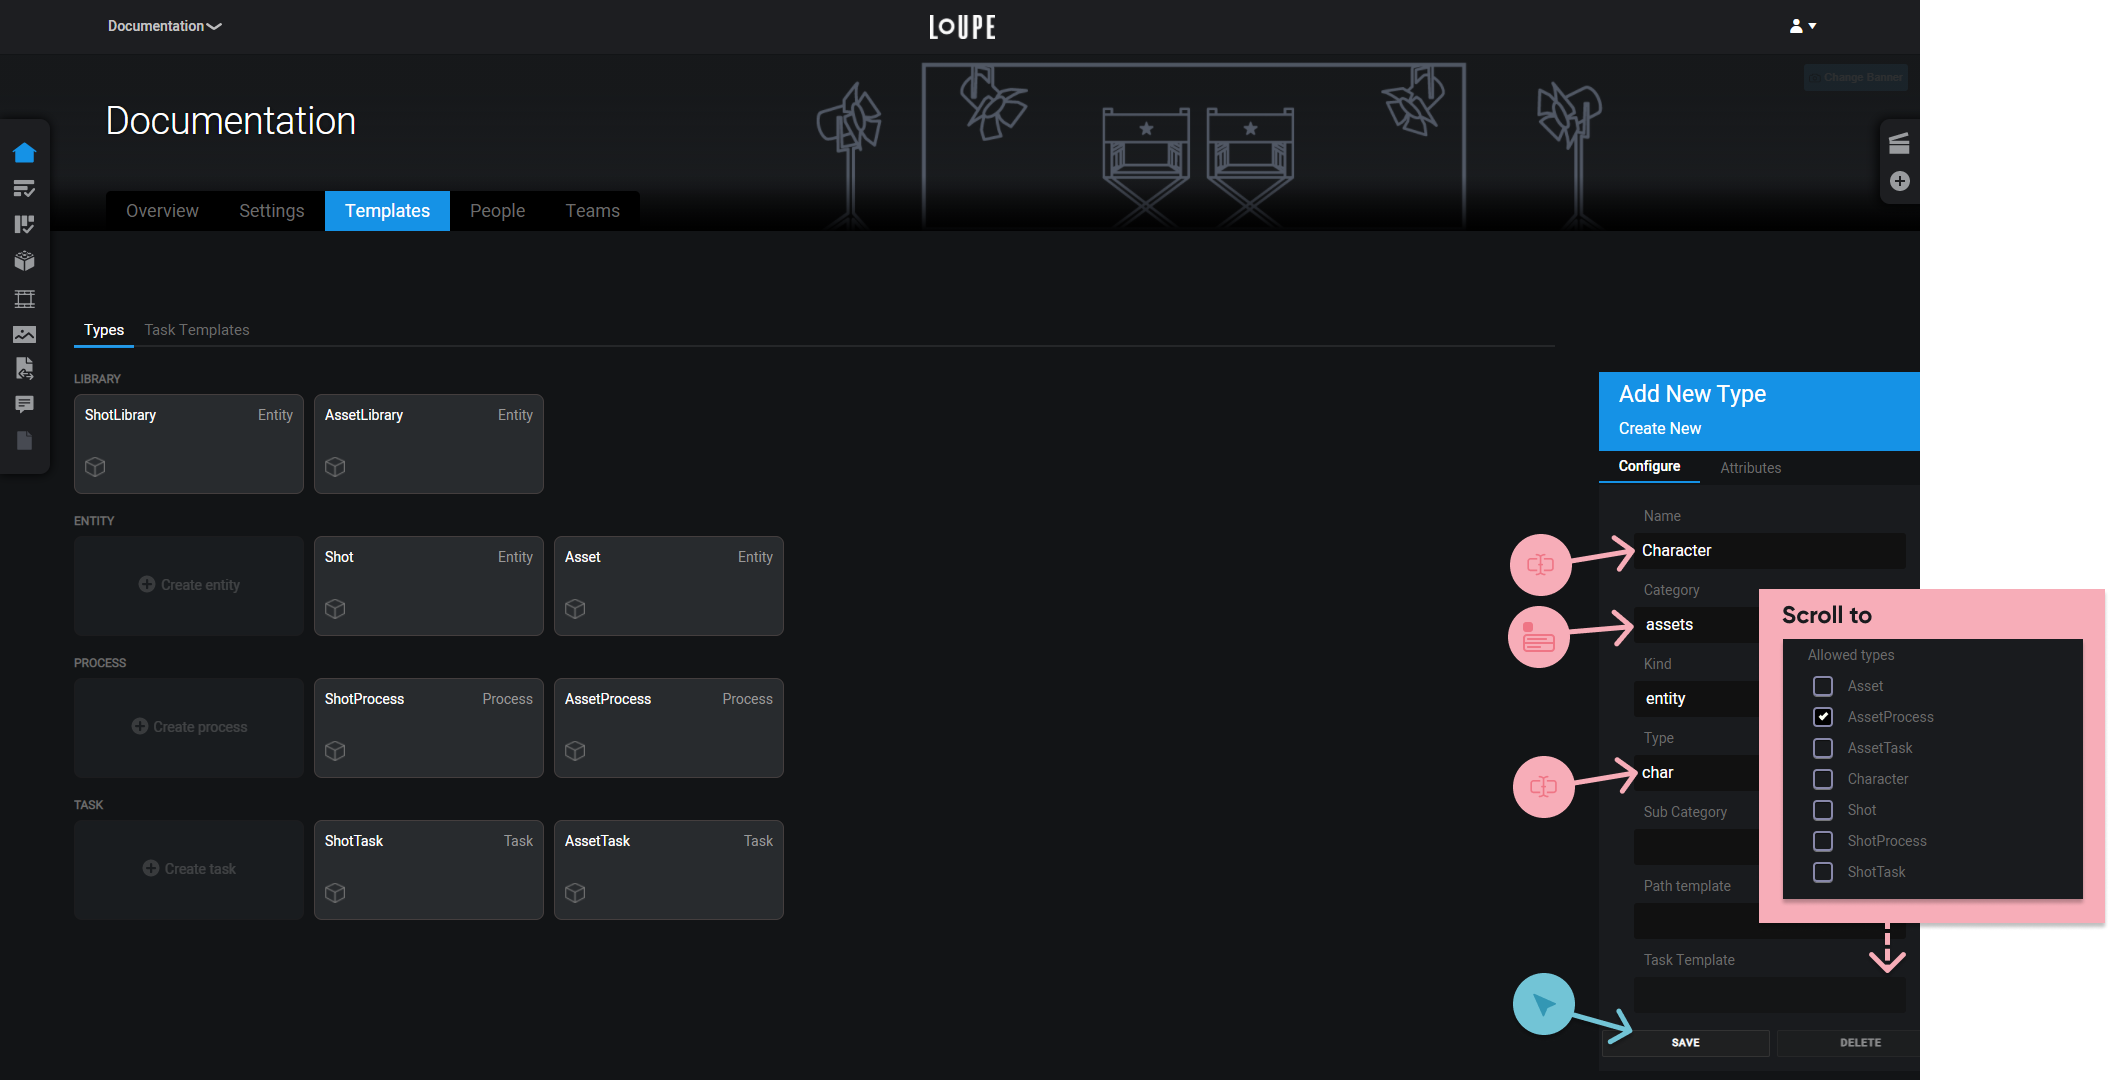
To create a type you’ll need to supply a Name, Category, and Type (code).
| Name | How this entity will be referred to (in the UI). |
| Category | Whether this asset should be associated with shots or assets for project management purposes. |
| Type | How this entity will be referred to on disk and via the API. |
Also scroll down to the Allowed Types section in the editor, and enable “Asset Process” so that we’re able to create Asset Processes (LoUPE created these as part of the Minimal Template) as children of Characters.
Add Type to Asset Library
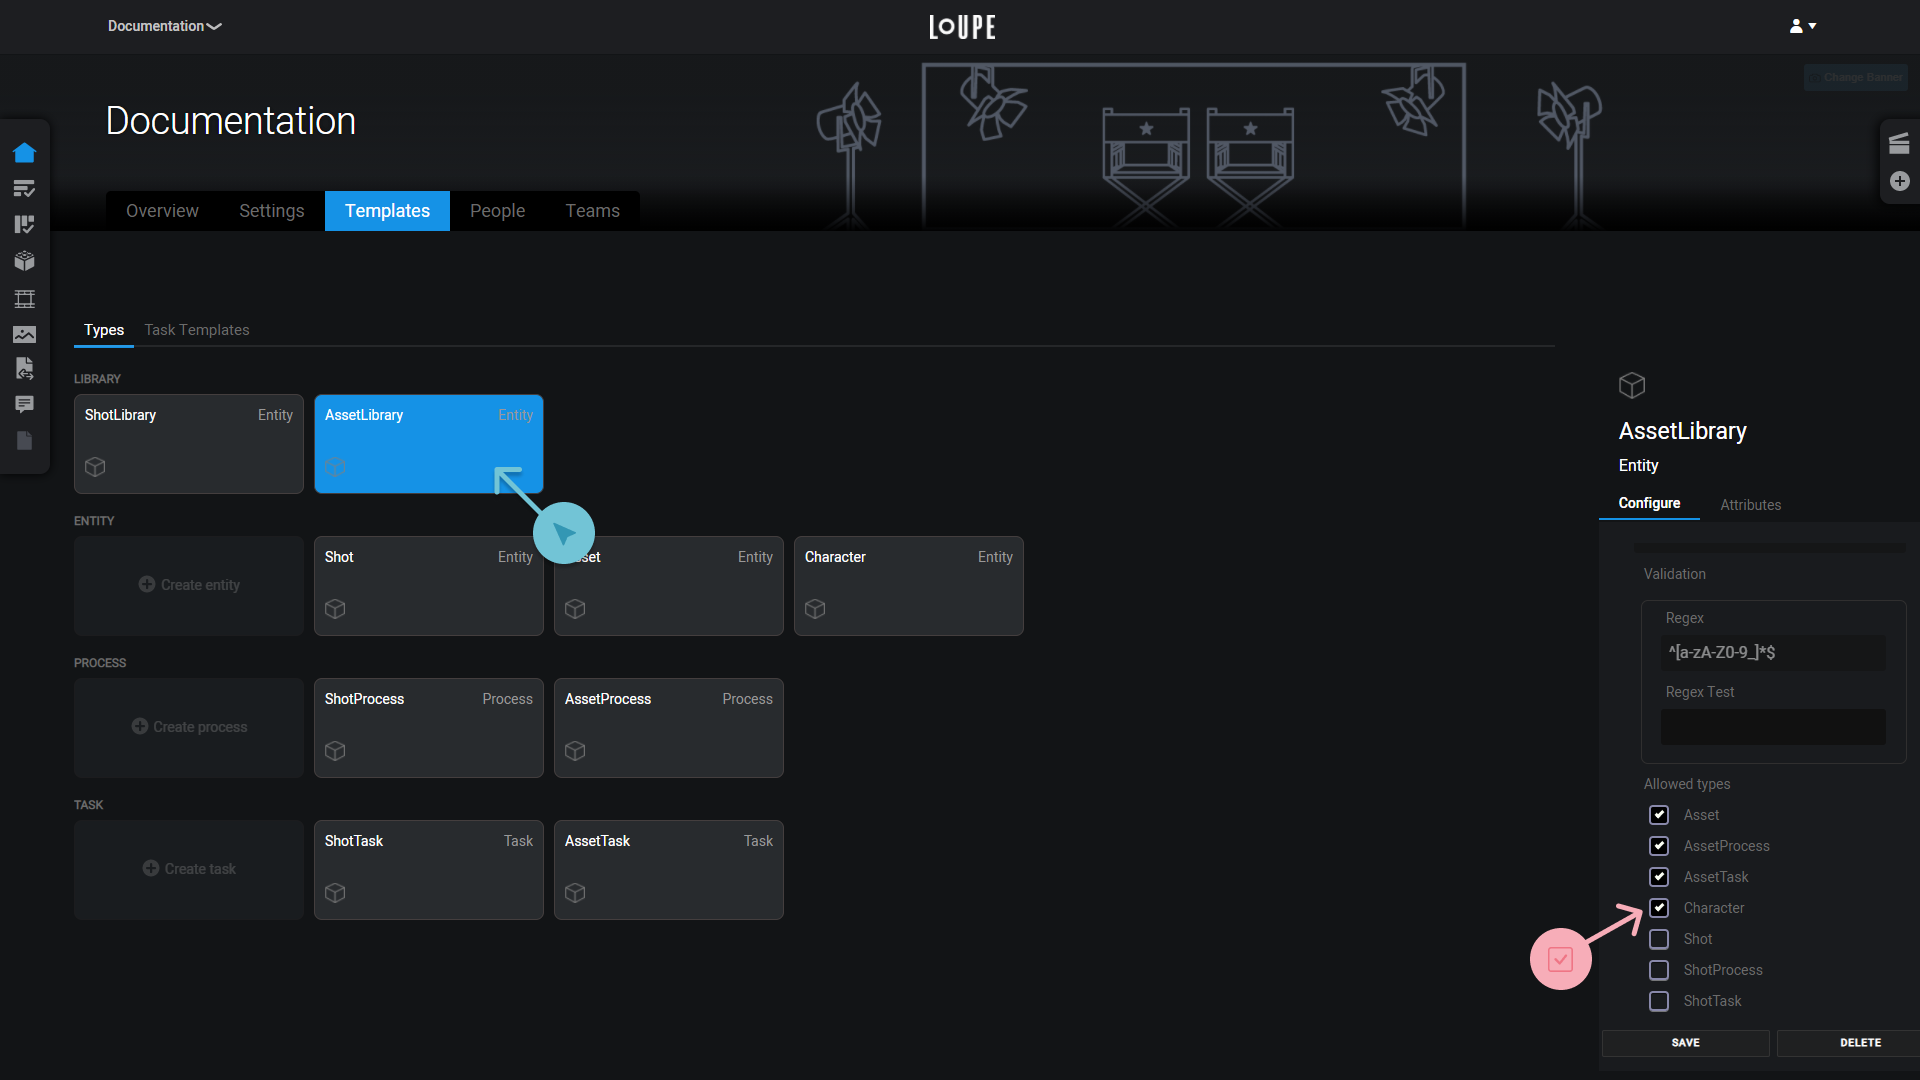
Now you have a new type, but until you allow it as the child of another Type, it can’t be created anywhere. Select the Asset Library, and scroll down to its Allowed Types in the editor.
Enable Character and click Save. Now we can create Characters in the Asset Library. (You can test this by opening the entity creation drawer from the Action Menu.)
At this point, you can start creating Characters, but we’ll also add a template so that when we do create a Character, we get some Processes and Tasks set up for us automatically.
Set up a Template
In order to have LoUPE automatically create processes and tasks for us when we make a new instance of a type, we need to define a template.
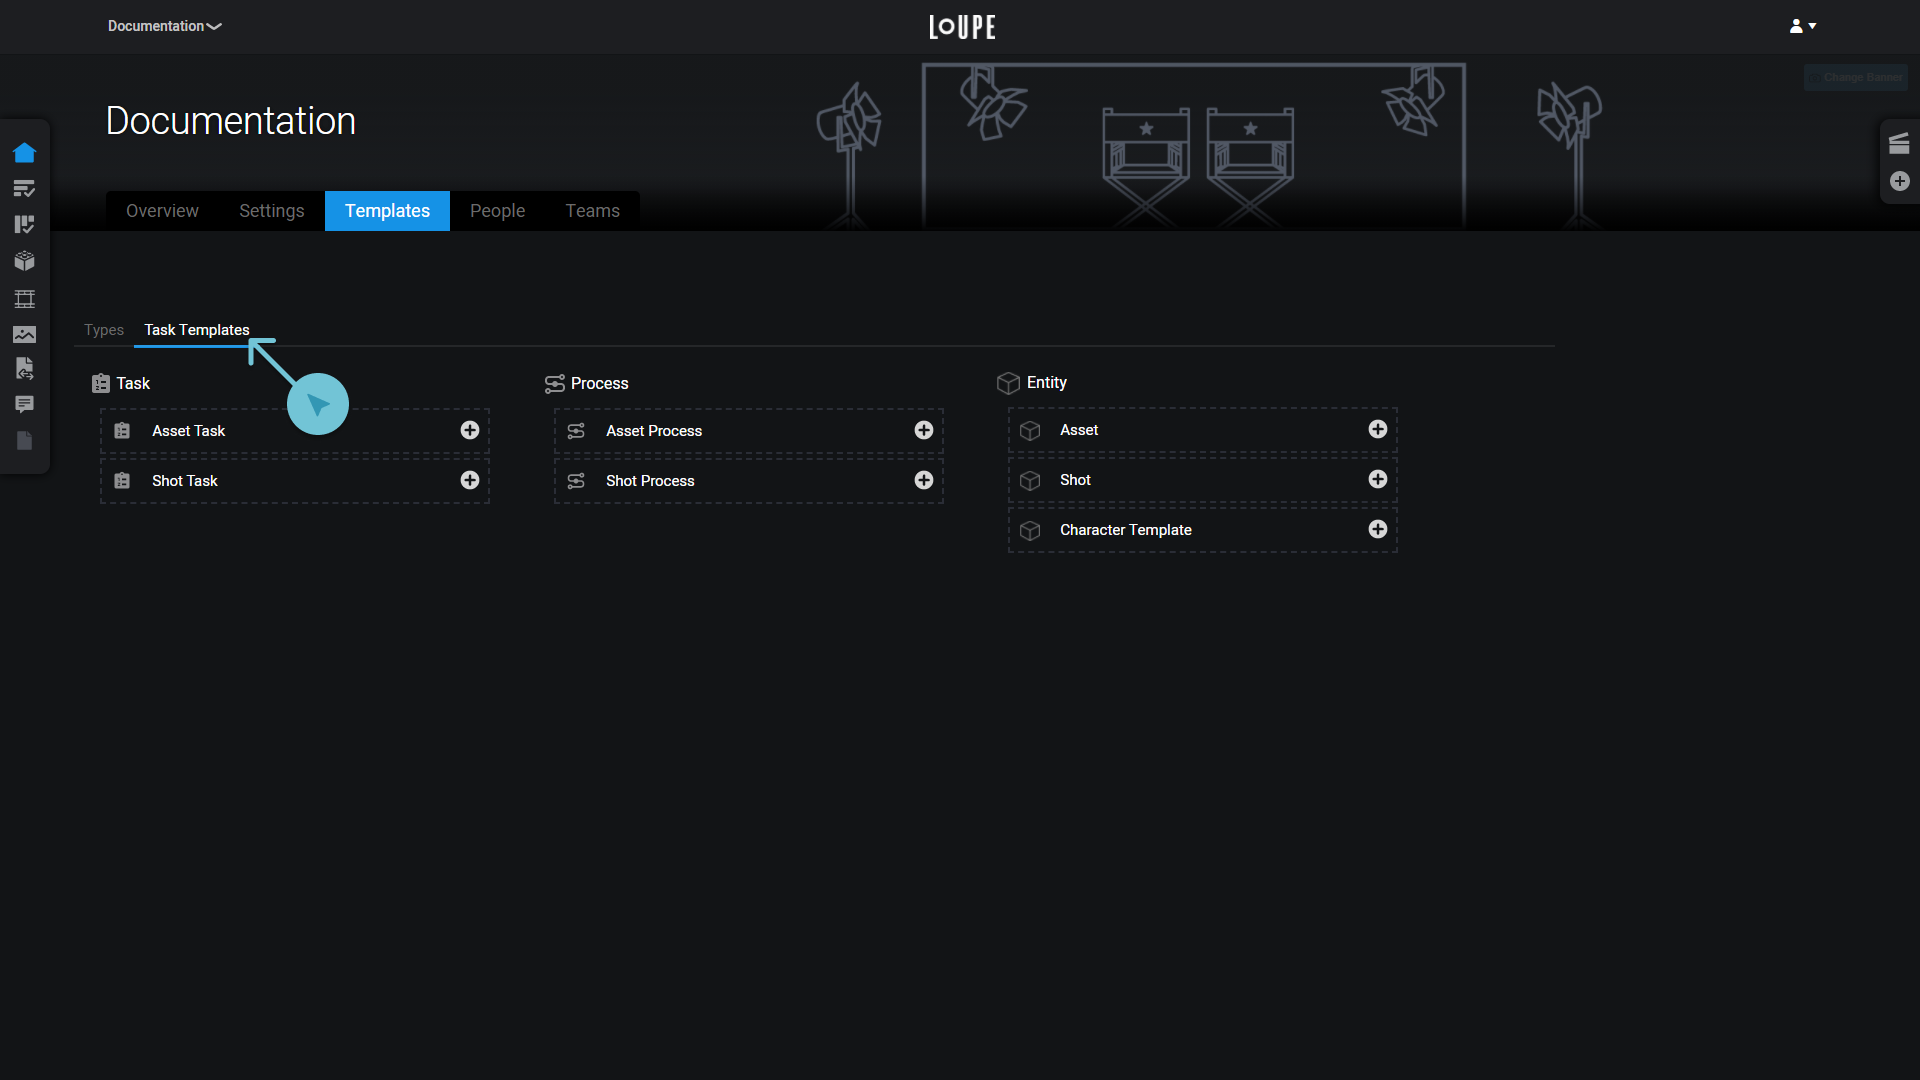
Switch to the “Task Templates” tab. You’ll see one template for each Type, including the Character Type that we created in the previous section.
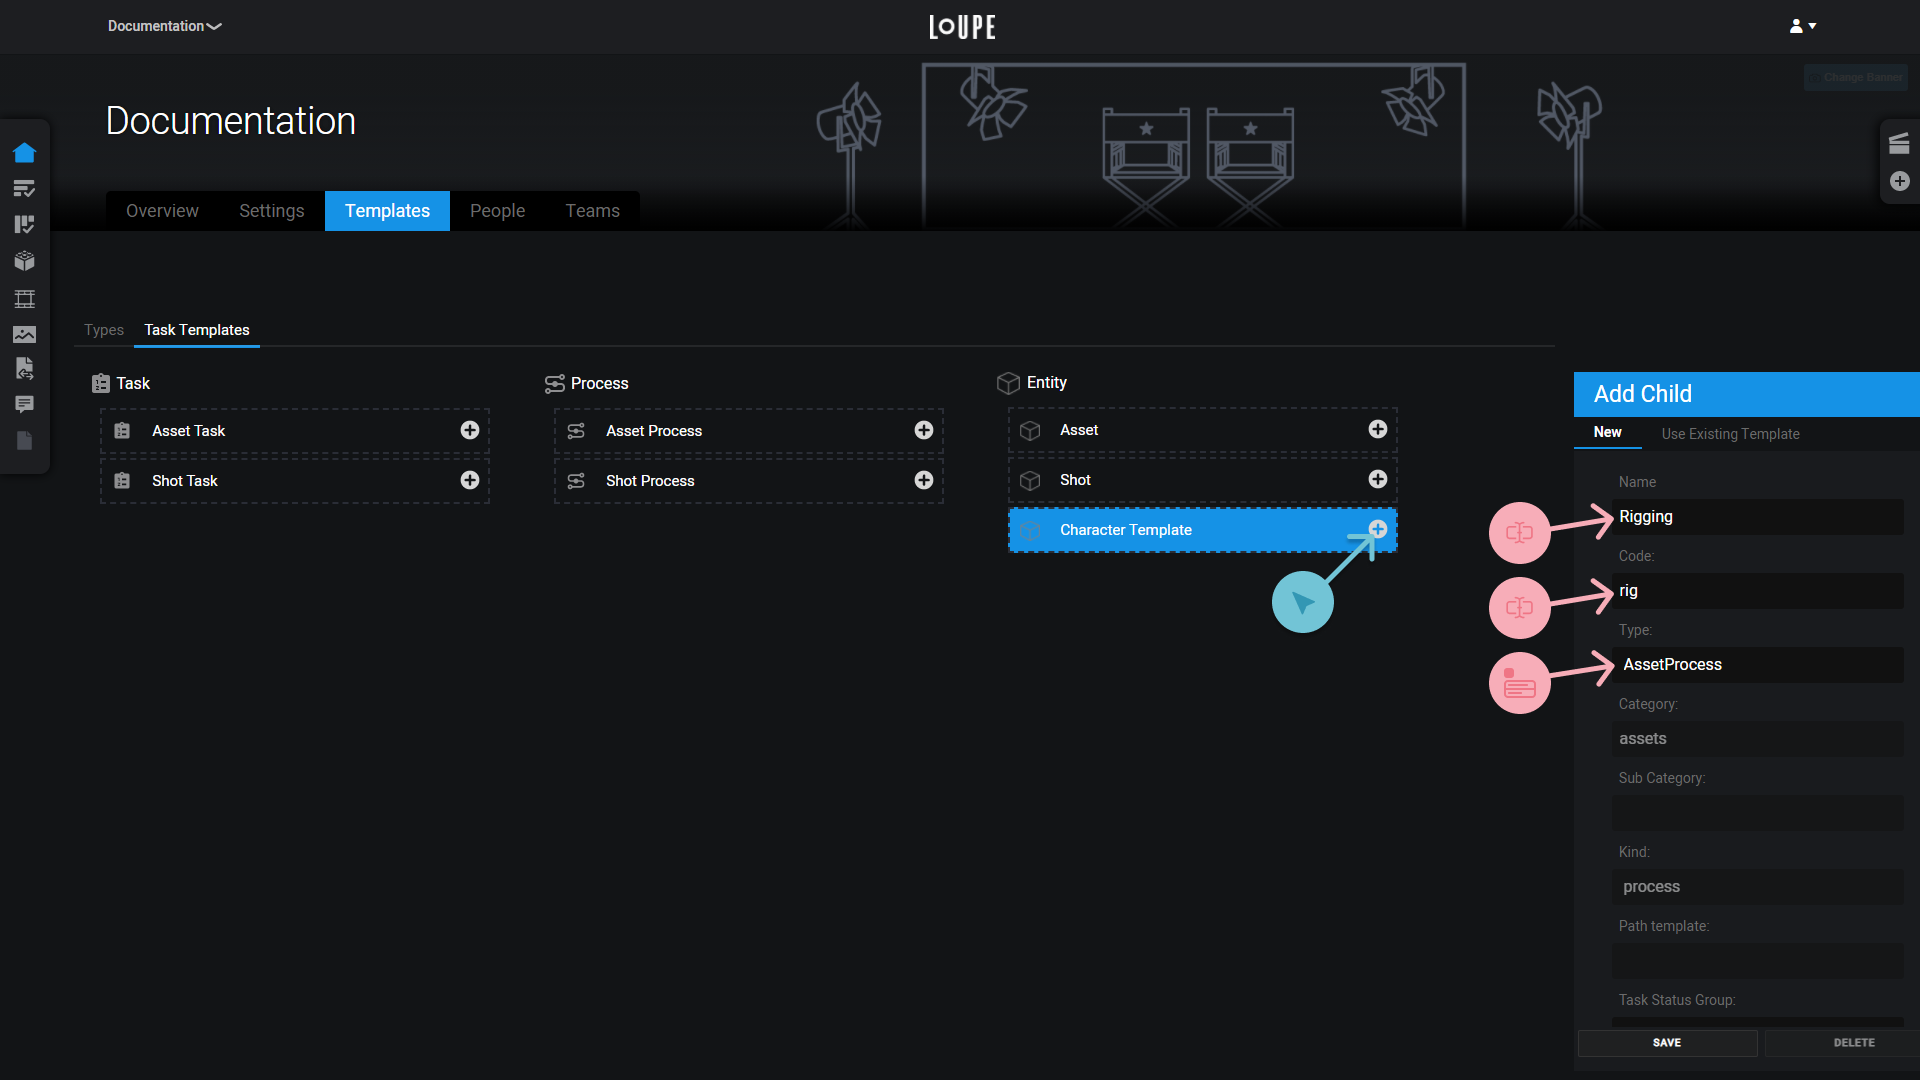
Click the “Add Child” button on the Character template, and an editor will open on the right side of the interface. Fill in the Name (we’ll call this process “Rigging”, Code (“rig”), and Type (because we only AssetProcesses when we defined the type, this is all we can pick form here).
| Name | How this process will be named. |
| Code | A short code that will be used to refer to this process on disk. |
| Type | What Type of child we want to create. |
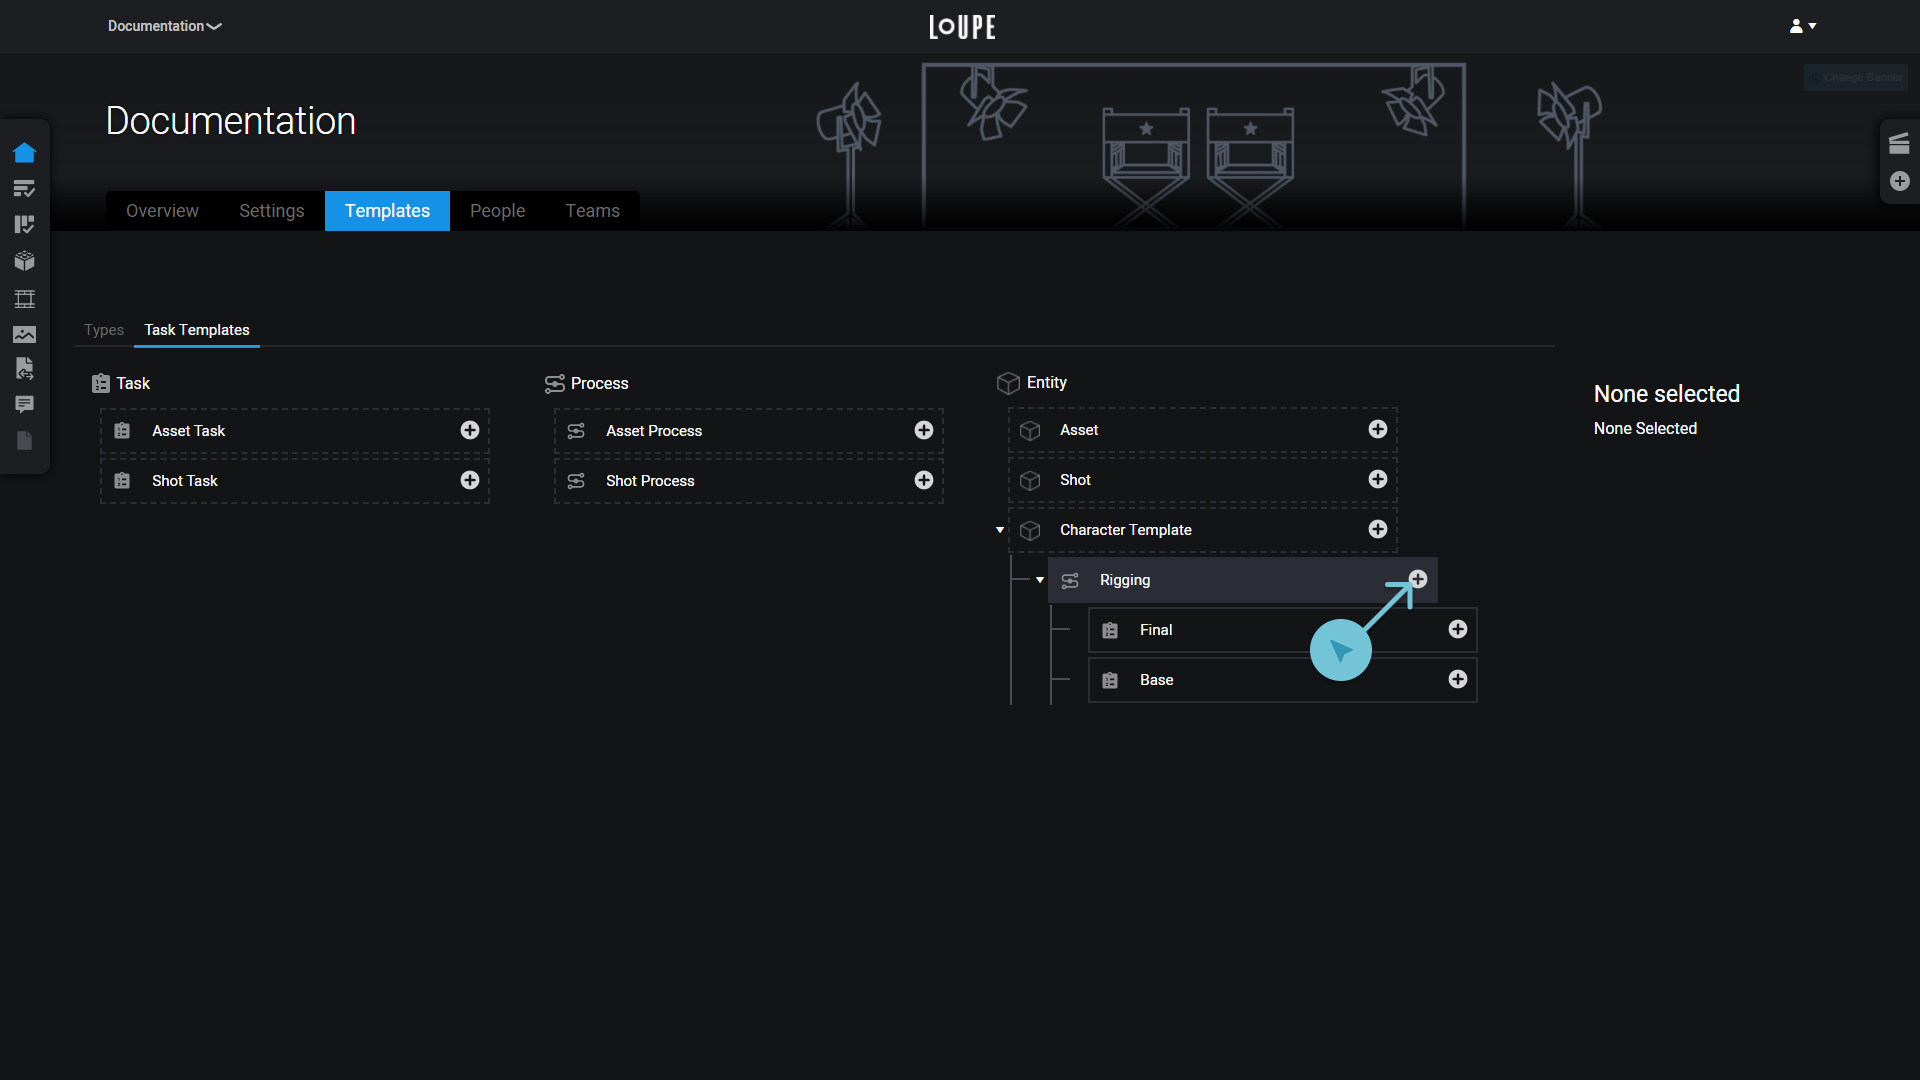
Repeat this process to add two child AssetTasks to the Rigging process.
Nested Templates
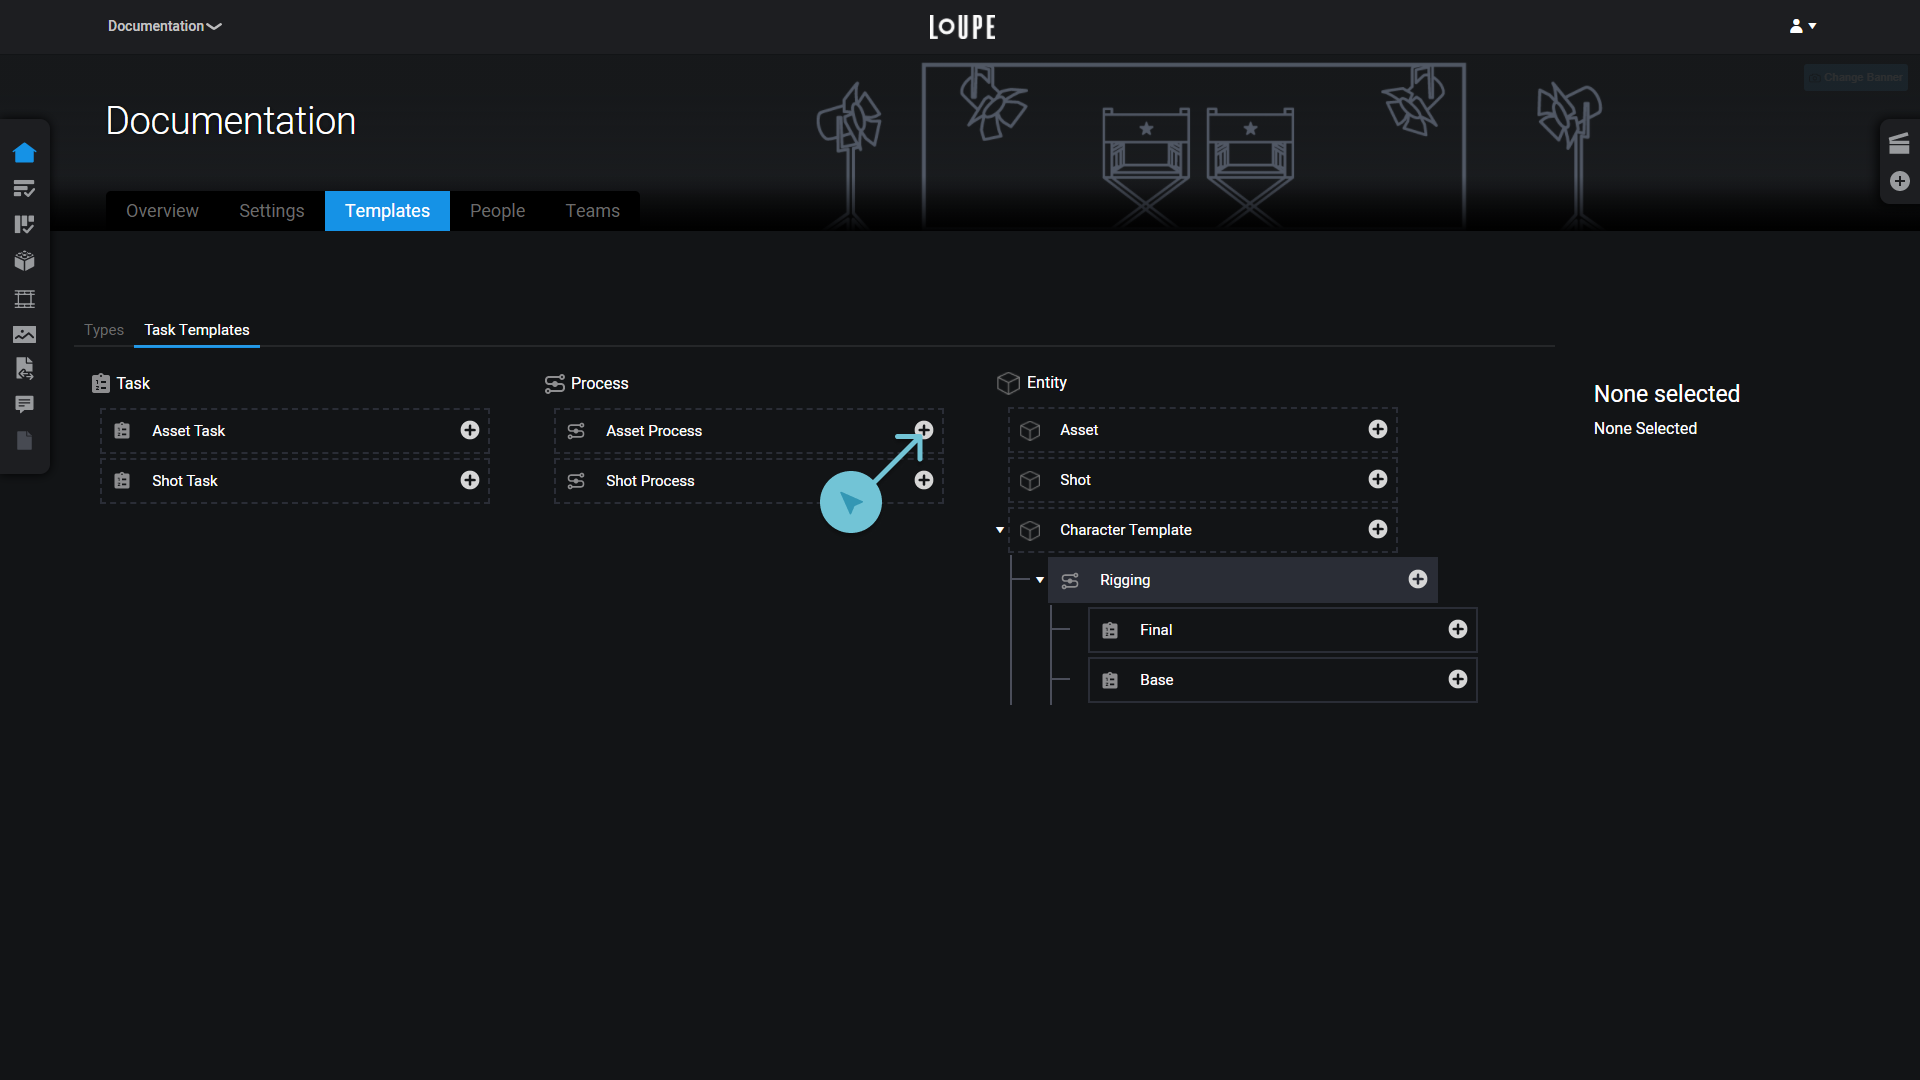
Instead of adding these child tasks to each process that we template manually, let’s add them to the AssetProcess template itself. This will create them automatically when we include an AssetProcess in another template.
Click the Add Child button on the Asset Process and repeat the previous steps.
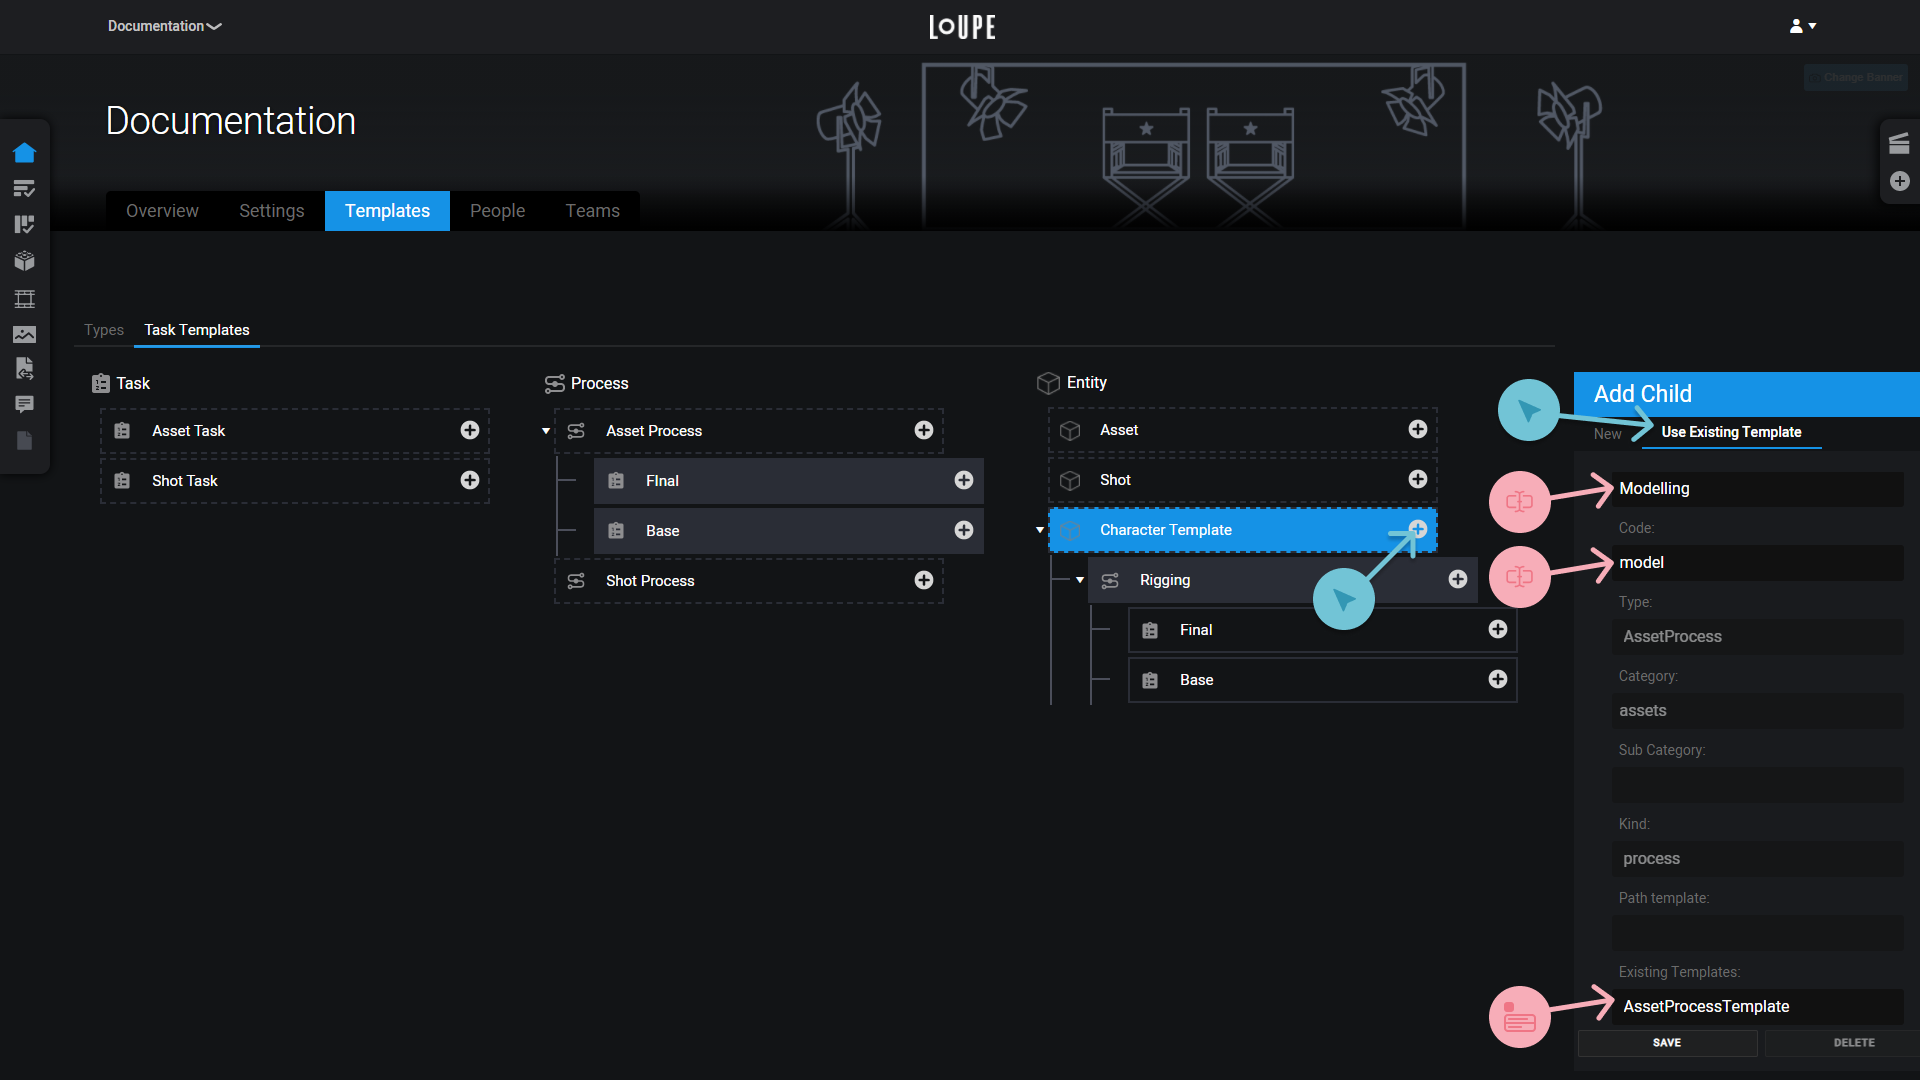
Then, click Add Child on the Character Template again, and switch the editor to “Use Existing Template”. Fill out the Name (“Modelling”), and Code (“model”) as before, then choose “Asset Process Template” from the “Existing Templates” dropdown.
This will add a child AssetProcess along with the tasks from its template.
